
Shopping Cart
How to Install Incredible Underwater Dock Lights in 5 Easy Steps
Installing underwater dock lights is an excellent way to enhance your waterfront property, boost visibility, and attract aquatic life. While the thought of installation might seem daunting, Incredible Underwater LED Lighting makes the process straightforward and accessible. With our user-friendly design and durable construction, you can install your lights quickly and efficiently. Here’s a step-by-step guide to help you set up your LED dock lights in just five easy steps.
Step 1: Gather the Necessary Tools and Materials
Before starting, ensure you have all the tools and materials needed for installation. This typically includes:
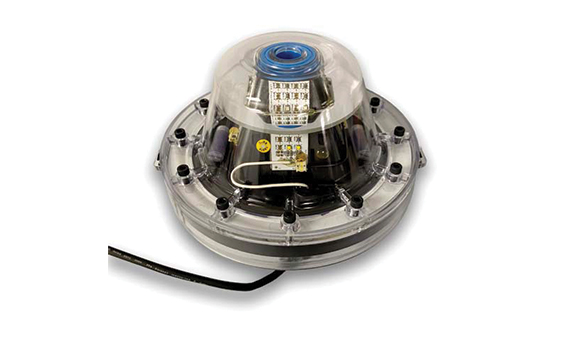
- The underwater dock lights from Incredible Underwater LED Lighting
- A power source (such as a transformer or low-voltage system)
- A power drill with the appropriate bits
- Waterproof connectors and cables
- Mounting hardware (usually included with the lights)
- Zip ties or clips for cable management
Having everything ready will make the installation smoother and save you time.
Step 2: Plan the Placement of the Lights
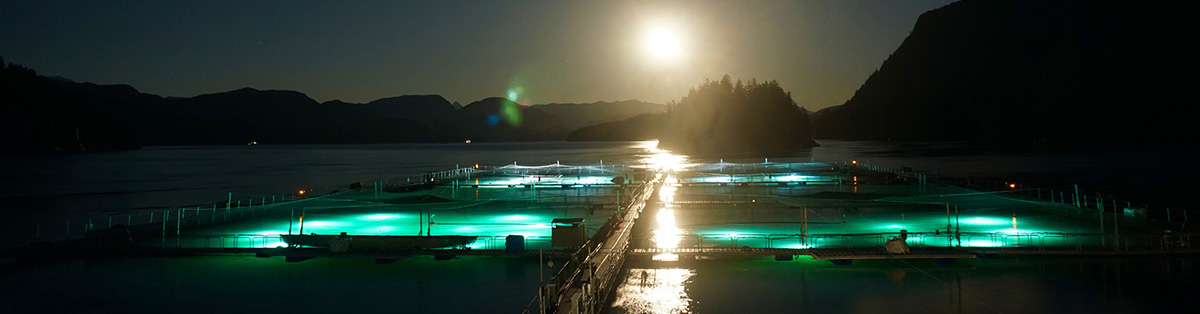
Determine where you want to place the lights. Consider factors such as water depth, visibility, and the areas you want to illuminate. For underwater green lights, placing them near areas where fish are likely to gather can maximize their effectiveness.
Mark the spots where the lights will be installed, ensuring they are evenly spaced and positioned for optimal illumination. Keep in mind that LED dock lights perform best when submerged at the recommended depth, usually 2–6 feet below the water’s surface.
Step 3: Install the Lights in the Water
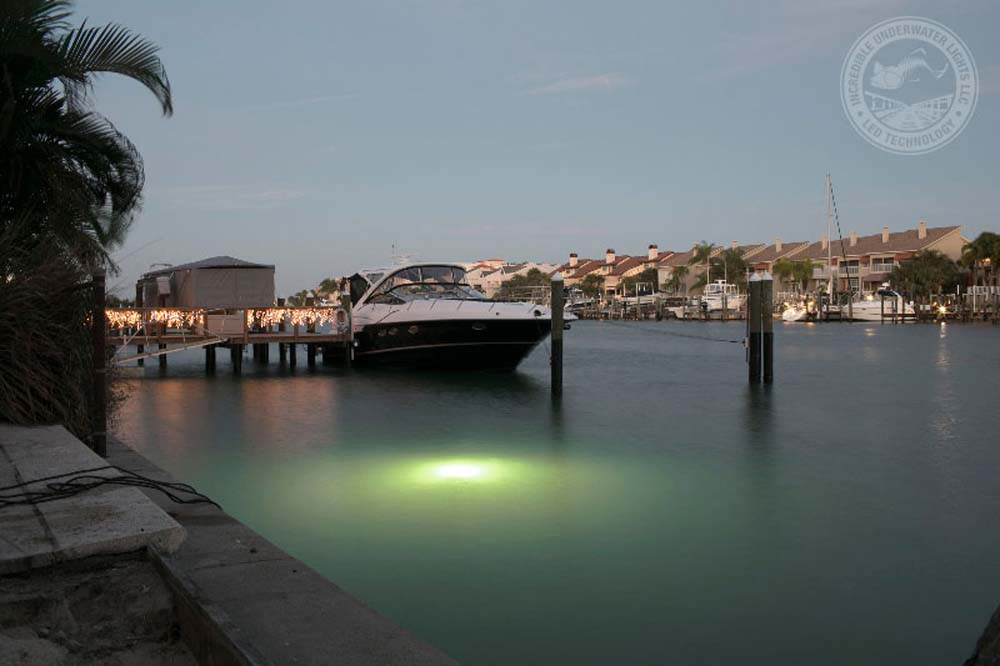
Attach the lights to the dock or pilings using the provided mounting brackets or clamps. Incredible Underwater LED Lights are designed to be easy to secure, even for those with minimal experience.
Ensure that the lights are firmly in place and directed downward or outward into the water for the best effect. Use zip ties or clips to organize the cables, keeping them neatly secured and out of the way.
Step 4: Connect the Power Supply
Run the cables from the lights to the power source, ensuring that all connections are waterproof and secure. This is crucial for both safety and functionality. Most LED lighting for docks operates on low-voltage systems, making them energy-efficient and safe to install.
Follow the manufacturer’s instructions for connecting the lights to the power supply, and test each connection before sealing it with waterproof tape or connectors.
Step 5: Test and Adjust the Lights
Once all the lights are installed and connected, power them on to test their functionality. Check for consistent brightness and ensure each light is properly positioned. If necessary, adjust the angle or placement to achieve the desired effect.
With Incredible Underwater LED Lighting, you’ll notice an immediate difference in the appearance of your dock and the surrounding water, thanks to their vibrant glow and superior brightness.
Enjoy the Benefits of Your New Dock Lights
Congratulations! You’ve successfully installed your underwater dock lights. Now, you can enjoy improved safety, enhanced aesthetics, and a boost in aquatic activity around your dock. Whether you’re using the lights for fishing or simply creating a serene waterfront atmosphere, the result is well worth the effort.
Installing high-quality underwater dock lights has never been easier. With Incredible Underwater LED Lighting, you get energy-efficient, durable, and visually stunning lights that are simple to set up.
Ready to transform your dock? Get in touch with us today to explore our range of easy-to-install lighting solutions and enjoy unparalleled performance.