
Shopping Cart
DIY Installation: How to Install Underwater Dock Lights
Installing underwater dock lights yourself can enhance your waterfront with vibrant illumination while saving on professional installation costs. These lights improve safety, attract fish, and elevate aesthetics, and their user-friendly design makes DIY setup accessible. This step-by-step guide provides clear instructions for installing underwater dock lights, covering necessary tools, safety tips, and best practices. With the right preparation, you can achieve professional-quality results, ensuring your dock is both functional and visually stunning. Designed for beginners and experienced DIYers, this guide empowers property owners to install durable, energy-efficient lights confidently.
Step 1: Gather Tools and Materials
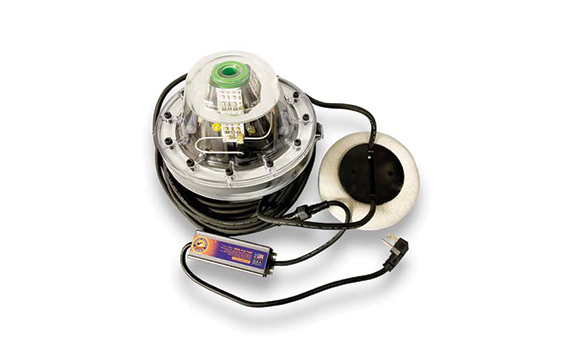
Begin by assembling the necessary tools and materials for installing underwater dock lights. You’ll need a light system (preferably with 16,000–32,000 lumens), a depth-adjustable anchoring system, a power supply with an AC-to-DC driver, a screwdriver, pliers, waterproof connectors, and a measuring tape. Ensure the light includes electronic overload protection for safety. A small boat or ladder may be required for dock access. Check the manufacturer’s instructions for specific requirements, such as cable lengths or mounting hardware.
Step 2: Plan the Installation Location
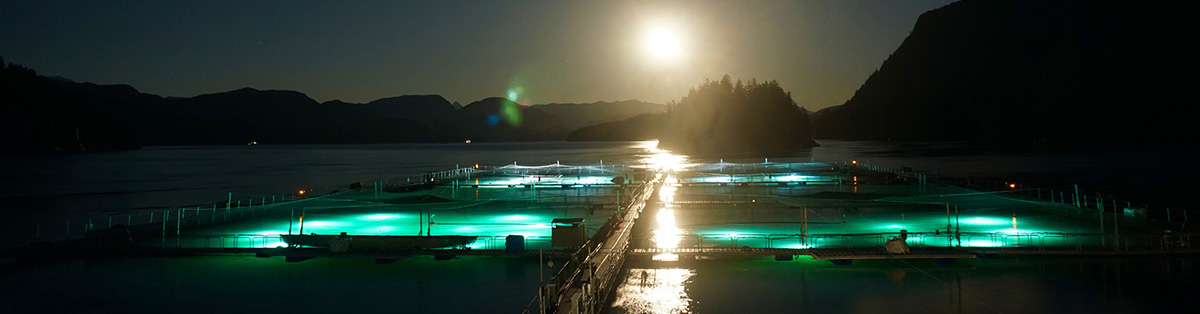
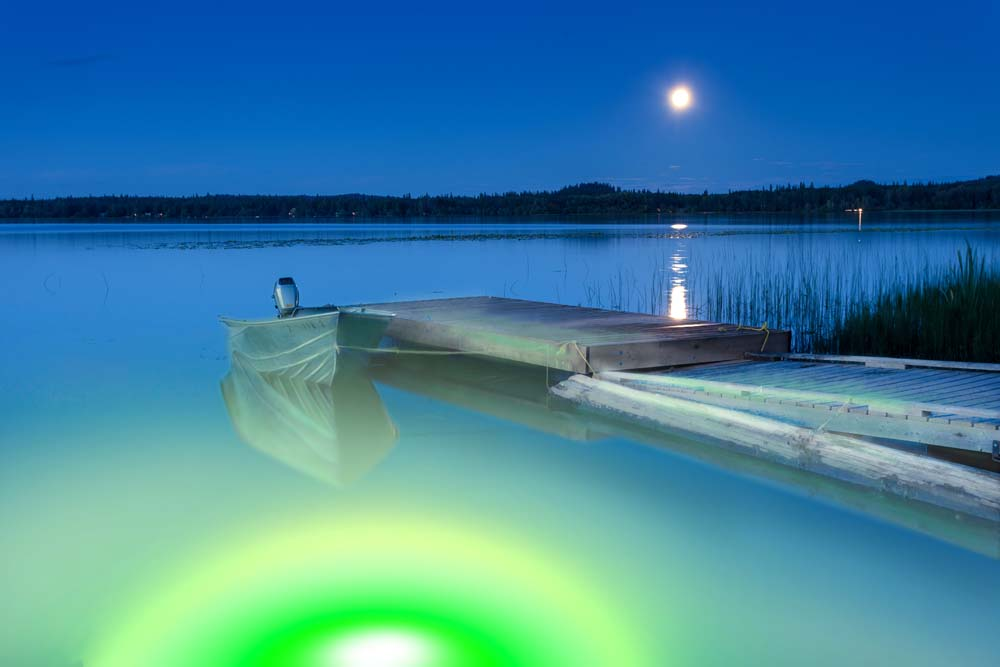
Planning the installation location is critical for optimal light performance. Position lights 4-6 feet below the water surface to maximize illumination and fish attraction, using the depth-adjustable anchoring system. Choose spots near dock edges for enhanced visibility and safety, avoiding areas with heavy boat traffic to prevent damage. Measure the distance from the power source to ensure cables reach comfortably. Blue lights are ideal for clear water, while green lights suit murky conditions.
Step 3: Install the Anchoring System
Secure the anchoring system to hold the underwater dock light in place. Attach the anchor (typically a weight or mount) to the light’s base, following the manufacturer’s guidelines. Lower the anchor to the desired depth (4-6 feet), ensuring it rests firmly on the lake or ocean floor. Use a boat or ladder for safe access, and secure the cable to the dock to prevent movement. The durable, multi-faceted housing should withstand marine conditions.
Step 4: Connect the Power Supply Safely
Connect the light to the power supply using the AC-to-DC driver, which supports low-voltage DC operation for energy efficiency and safety. Attach waterproof connectors to the cables, ensuring a tight seal to prevent water ingress. Route cables along the dock, securing them with clips to avoid tripping hazards. Verify that the system includes electronic overload protection to prevent electrical issues. Test the connection before finalizing.
Step 5: Test and Adjust the Lights
Once installed, test the underwater dock lights to confirm functionality. Turn on the power to check for consistent illumination, ensuring the light reaches the desired 60-foot range. Adjust the depth or angle if needed to optimize visibility, fish attraction, or aesthetics. Green lights enhance fishing, while blue boosts clarity. Clean the housing periodically to maintain brightness.
Located in Pinellas Park, Florida, Incredible Underwater LED Lighting specializes in top-tier underwater dock lights that make dock installation straightforward and effective. Our marine underwater lights, such as the Mega-Watt and Apollo, provide brilliant illumination, long-lasting durability, and a simple setup for waterfront enthusiasts. With a one-year warranty and rapid shipping on underwater green lights, we guarantee customer satisfaction and reliable performance.
Contact us now.